Astrophotography: The Best Mirrorless Lenses and How to Use a Celestron Telescope for Photography

The night sky reveals its secrets with the right gear and a little patience.
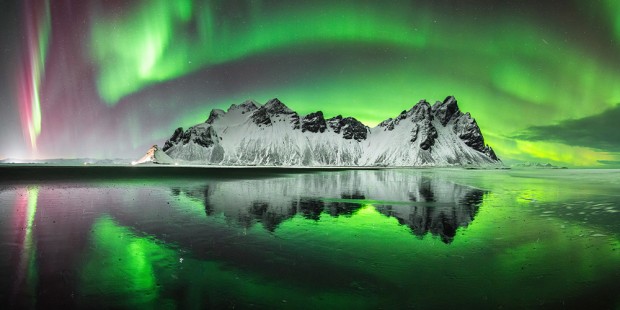
Astrophotography is one of the most rewarding—and challenging—genres of photography. From wide-field Milky Way and aurora panoramas to ultra-detailed shots of distant nebulae, it offers a gateway to both artistic expression and scientific curiosity. As an enthusiast with a mirrorless setup, you’re already ahead of the curve in terms of portability and image quality. But to capture the cosmos in all its glory, you’ll want the right lenses and gear to match your ambition.
Best Mirrorless Camera Lenses for Astrophotography

Top mirrorless lenses for capturing wide-field nightscapes across different mounts.The ideal astrophotography lens is fast, wide, and sharp across the frame—even at its widest aperture. Since we’re often shooting at night with long exposures and high ISOs, lens quality can make or break an image. Below are some of the top lens choices for various mirrorless systems:
Sony E-Mount
- Sony FE 20mm f/1.8 G
Lightweight, tack-sharp, and with minimal coma—even wide open. Great for nightscapes and Milky Way compositions. - Sigma 14mm f/1.4 DG DN Art
Specifically designed for astrophotography. Exceptional low-light performance and edge-to-edge sharpness, albeit with more bulk.
Canon RF-Mount
- Canon RF 15-35mm f/2.8L IS USM
A versatile wide zoom with excellent image quality and stabilization. Perfect for both landscapes and the night sky. - Samyang MF 14mm f/2.8 for Canon RF
A manual focus gem with solid astro performance at a much lower price point.
Nikon Z-Mount
- Nikon NIKKOR Z 14-24mm f/2.8 S
Ultra-wide, distortion-free, and razor-sharp—one of the best wide zooms available for astro and landscape photographers alike. - Samyang MF 14mm f/2.8 for Nikon Z
A budget-friendly manual focus lens offering impressive wide-angle capabilities for astrophotography.
Fujifilm X-Mount
- Samyang MF 12mm f/2.0 for Fuji X
A budget-friendly favorite with strong low-light capability and very good corner performance for an APS-C lens. - Samyang AF 12mm f/2.0 for Fuji X
The autofocus version of the popular 12mm lens, offering convenience without compromising on image quality.
Micro Four Thirds
- Olympus M.ZUIKO DIGITAL ED 12mm f/2.0
Sharp, compact, and fast—ideal for portability without sacrificing performance under the stars.
Tip: When shopping for a lens, research coma performance and corner sharpness. A wide aperture is important, but edge clarity is what separates a decent astro lens from a great one.

Left: Budget lens with corner coma. Right: Premium lens with clean stars across the frame.Using a Celestron Telescope with a Mirrorless Camera for Deep Space Photography

Connecting your mirrorless camera to a Celestron telescope using a T-ring and adapter.When you’re ready to move from wide-field nightscapes to deep-sky imaging—capturing nebulae, galaxies, and star clusters—a telescope becomes your best friend. Celestron offers a range of telescopes well-suited for this purpose, and they pair beautifully with mirrorless cameras. Here's a step-by-step guide to get you started:
1. Choose the Right Telescope
For deep space imaging, consider the Celestron Schmidt-Cassegrain scopes. These offer long focal lengths and high resolution, ideal for tight celestial targets. Pair them with an equatorial mount like the Celestron Advanced VX (AVX) or CGX for precise tracking.
2. Get the Correct Adapters
To physically attach your mirrorless camera to the telescope, you'll need two things:
- T-Ring: A lens mount adapter for your specific camera brand (e.g., Sony E, Canon RF, Nikon Z).
- T-Adapter: Connects the T-ring to the telescope’s visual back, essentially turning the telescope into a massive telephoto lens.
Bonus: For EdgeHD scopes, consider using a focal reducer to speed up your optics and widen your field of view.
3. Set Up for Prime Focus Imaging
Prime focus is when the telescope acts as the camera lens. Here's how:
- Remove the telescope’s eyepiece and diagonal.
- Attach the T-ring to your camera body.
- Connect the T-ring to the T-adapter.
- Mount the whole assembly to the telescope's visual back.
Now your camera is ready to capture photons from deep space—directly through the telescope.
4. Tracking and Guiding

A tracking mount is essential for long exposures and sharp deep sky photos.Deep space photography requires long exposures—sometimes several minutes. That means you need:
- Motorized Equatorial Mount: Align it with Polaris (or the celestial pole in your hemisphere)
- Autoguider (optional but recommended): A secondary camera and guide scope help fine-tune tracking to eliminate even the tiniest star drift.
5. Achieving Sharp Focus
Focusing through a telescope is incredibly precise and finicky. Tools like a Bahtinov mask can help you get razor-sharp stars. Live View with focus magnification on your mirrorless camera is also essential.

A Bahtinov mask ensures pinpoint focus on stars—a must for deep sky work.6. Capture and Stack
- Shoot in RAW format for maximum editing latitude.
- Take multiple exposures—also known as light frames—and combine them later using stacking software like DeepSkyStacker, Sequator, or PixInsight.
- Don’t forget calibration frames (dark, flat, bias) to clean up noise, vignetting, and sensor artifacts.

Stacked and processed deep sky photo, before and after editing.
Final ThoughtsAstrophotography can seem technical at first, but once you’ve dialed in your gear and workflow, it becomes a deeply rewarding part of your photography journey. Whether you're capturing wide-angle shots of the Milky Way with a fast mirrorless lens or revealing the delicate filaments of a distant nebula through a Celestron telescope, each image is a little miracle of light and time.
So grab your camera, head under the stars, and get ready to see the universe in a whole new way.

Astrophotography is a journey—part science, part art, and 100% wonder.- Sony FE 20mm f/1.8 G
-
Posted by Graham Fry
25th April 2025


